QuickRev implements a Complete Review Cycle.
This means the review continues as long as review comments will be made.
The following diagram demonstrates this review cycle.

1. Creation
![[See]](images/see.png) | Create A New Project |
2. Review
| Perform Review |
3. Correction
Afterwards a new review cycle has to be started. This includes the selection of the new file versions, adding of new files and removing of deleted files, so that the reviewers can review the changes made by their comments. The phase ends with the completion of the conclusion at the Conclusion tab.
| Correction Phase |
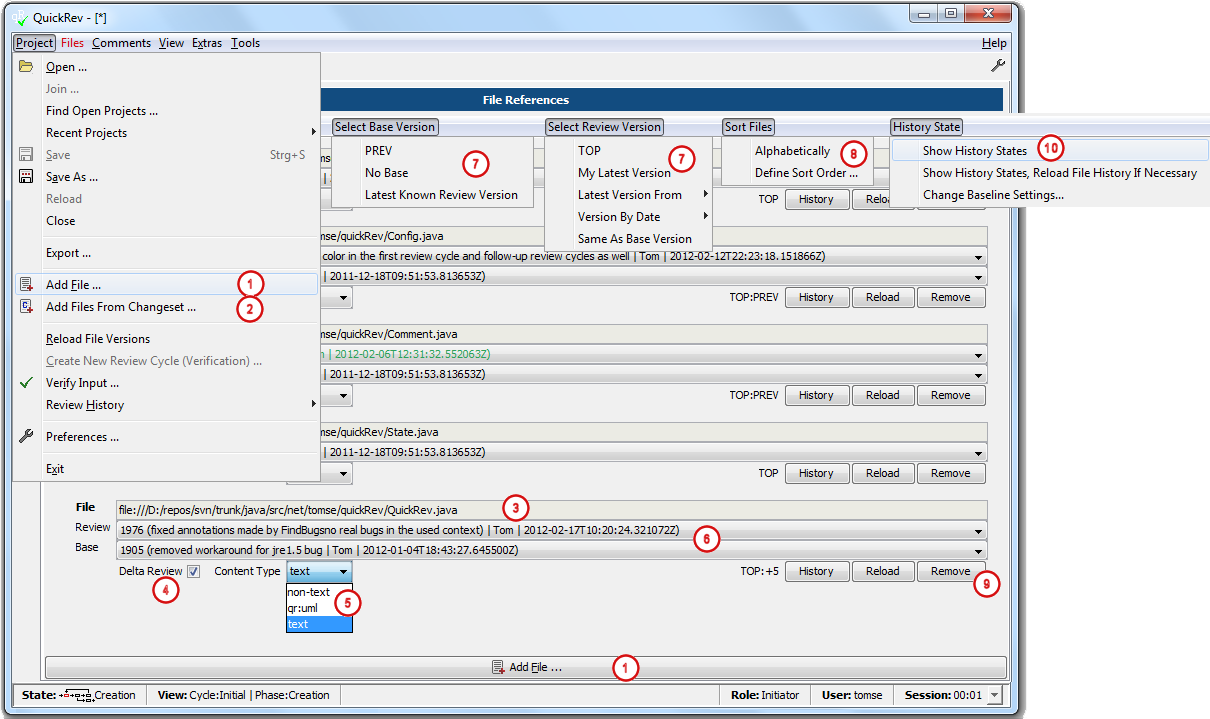
Select file references
Alternatively you can add, remove and change files like shown below.
-
Add new files to the project
To add new files to the project use the → menu or the Add File ... button at the File References tab.![[Note]](images/note.png)
Note To add files and change the file properties (versions etc.) the selected review phase has to be Creation or ALL otherwise the input fields and buttons will be disabled. When creating a new project Creation is selected as default, so normally you don't have to care about this. See Change Review Phase and Cycle for more information. ![[Tip]](images/tip.png)
Tip Review files can be added via command line as well. See chapter Command Line Options for more information.
-
Add files from changeset
If subversion is enabled in the Preferences dialog, review files can be added by selecting the corresponding changesets. This can be done via the → menu.See Add Files From Changeset ... for more information. -
Change file selection
To change an already added file click at the filename field and select the new path. Alternatively remove the file via its Remove button and add the right one again. -
Delta Review
Selecting Delta Review indicates, that not the whole file has to be reviewed, but the differences between two different file versions. By selecting the check box another version selection combo box (Base) will appear which allows the selection of the base version.
Note: QuickRev will select automatically the latest known review version of a file as base version if the review history of this file is available. For more information about the review history take a look at chapter Review History. To view the review history of a file use the History button.
Note: For selecting the base and review version of all added files by different topics use the Select Base Version and Select Review Version menus described in point 6. -
Select content type
The Content Type manages how files will be displayed in QuickRev. Usetextfor text files, i.e. source code reviews andnon-textfor files where the content of the files cannot be displayed in QuickRev (e.g. pdf files). Fornon-textfiles comments can be assigned to the whole file only by describing the position the comments depends to (no line numbers). File extensions fornon-textfiles can be configured via the Preferences dialog or via configuration files, so QuickRev will select the right content-type automatically. Other content-types like theqr:umltype are used from plug-ins which have to be loaded. See Plug-Ins for more information. -
Select file versions
Use the version selector combo boxes Review and Base to select the versions relevant for the review. -
Select file versions by topic
Via the Select Base Version and Select Review Version menus versions for the review files can be selected by different topics. Please take a look at the tool tips of every sub-menu-item to get a description. Files where a selection is not possible will be skipped, i.e. if you select → and a file has no previous version of the selected review version the selection for this file remains untouched. -
Sort files
Via the Sort Files menu the review files can be sorted alphabetically or in a user defined order. It is useful to bring the files in a 'recommended reading order' to simplify the review. -
Remove a file
Use the Remove button to remove a file. -
History state
Via the History States menu the current review sttate of a file can be displayed at the History buttons for each file as a little icon to have a better overview during file selection. Furthermore a baseline can be set for each version control system individually which marks a version / tag up to which all file versions will be regarded as 'reviewed'.
View selected files

When adding files and changing the file properties at the File References tab the content of the files
will not be loaded automatically, so when you want to see the file content of the selected files and versions
use the → menu.
This menu is colored red every time a reload is needed. Note: for the creation of a review it is not necessary to
load the file content. When reviewing the files by the reviewers the file content will be loaded automatically
on startup of QuickRev.
Describe what to review and select reviewers
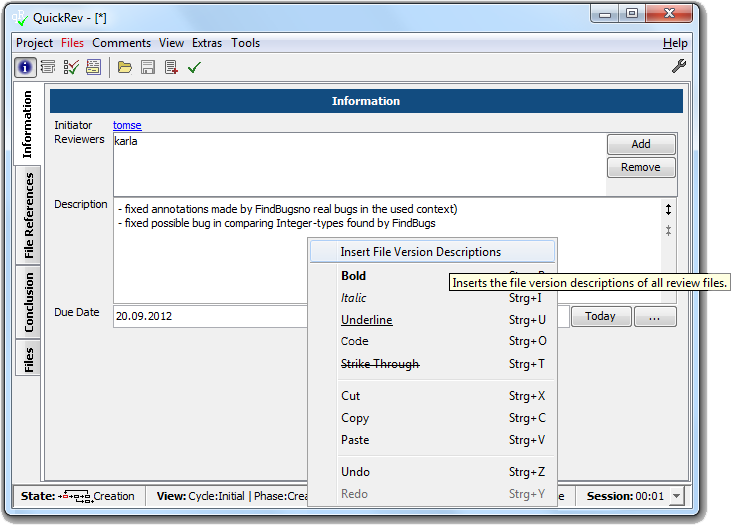
Add reviewers to the project in the Reviewers list. It is not necessary to add reviewers, because if someone starts the review, who is not contained in the list, he/she will be added automatically. But adding reviewers makes it easier e.g. to send email notifications automatically to the selected reviewers.
To change the initiator click on the name link of the initiator.
![[Configuration]](images/config.png) | Configuration |
|---|---|
| A list of users can be predefined via the Preferences dialog or for globally via configuration files to be selected easily as reviewer or initiator. |
| Configuration |
|---|---|
| The fields on the Information tab can be changed via configuration, so additional fields can be added and the existing once removed. For more information about this take a look at the configuration chapter. |
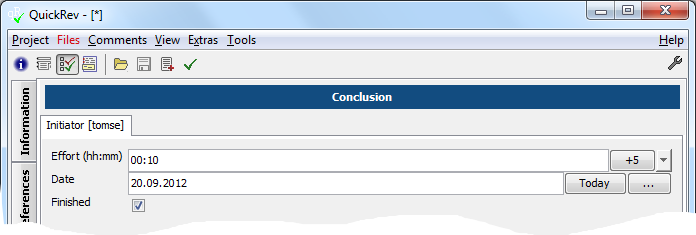
Fill in conclusion
| Configuration |
|---|---|
| The fields on the Conclusion tab can be changed via configuration, so additional fields can be added and the existing once removed. For more information about this take a look at the configuration chapter. |
Save and publish project
To publish the project use the → menu.
See Send Email Notification for more information about sending and configuring email notifications.
When sending email notifications it is even possible to attach an project and/or exported project without saving it before. This can be useful when
saving the project to some common location, but attaching an export file for reviewers without access to the version control system.
To simplify work you can combine different commands via the menu, so you can e.g. save the project file,
put it under version control and send an email notification in one step. For more information refer to the
Tools
chapter.
| Tip |
|---|---|
| Make use of the Input Verification dialog which will show you input fields which are not completed yet. The dialog can be reached via the menu → . For more information see Input Verification dialog. |